How to Upscale an Image in Photoshop vs an AI Upscaler
Compare Photoshop resampling and AI upscaling by detail, artifacts, control, speed, print preparation, and the accuracy requirements of the final image.
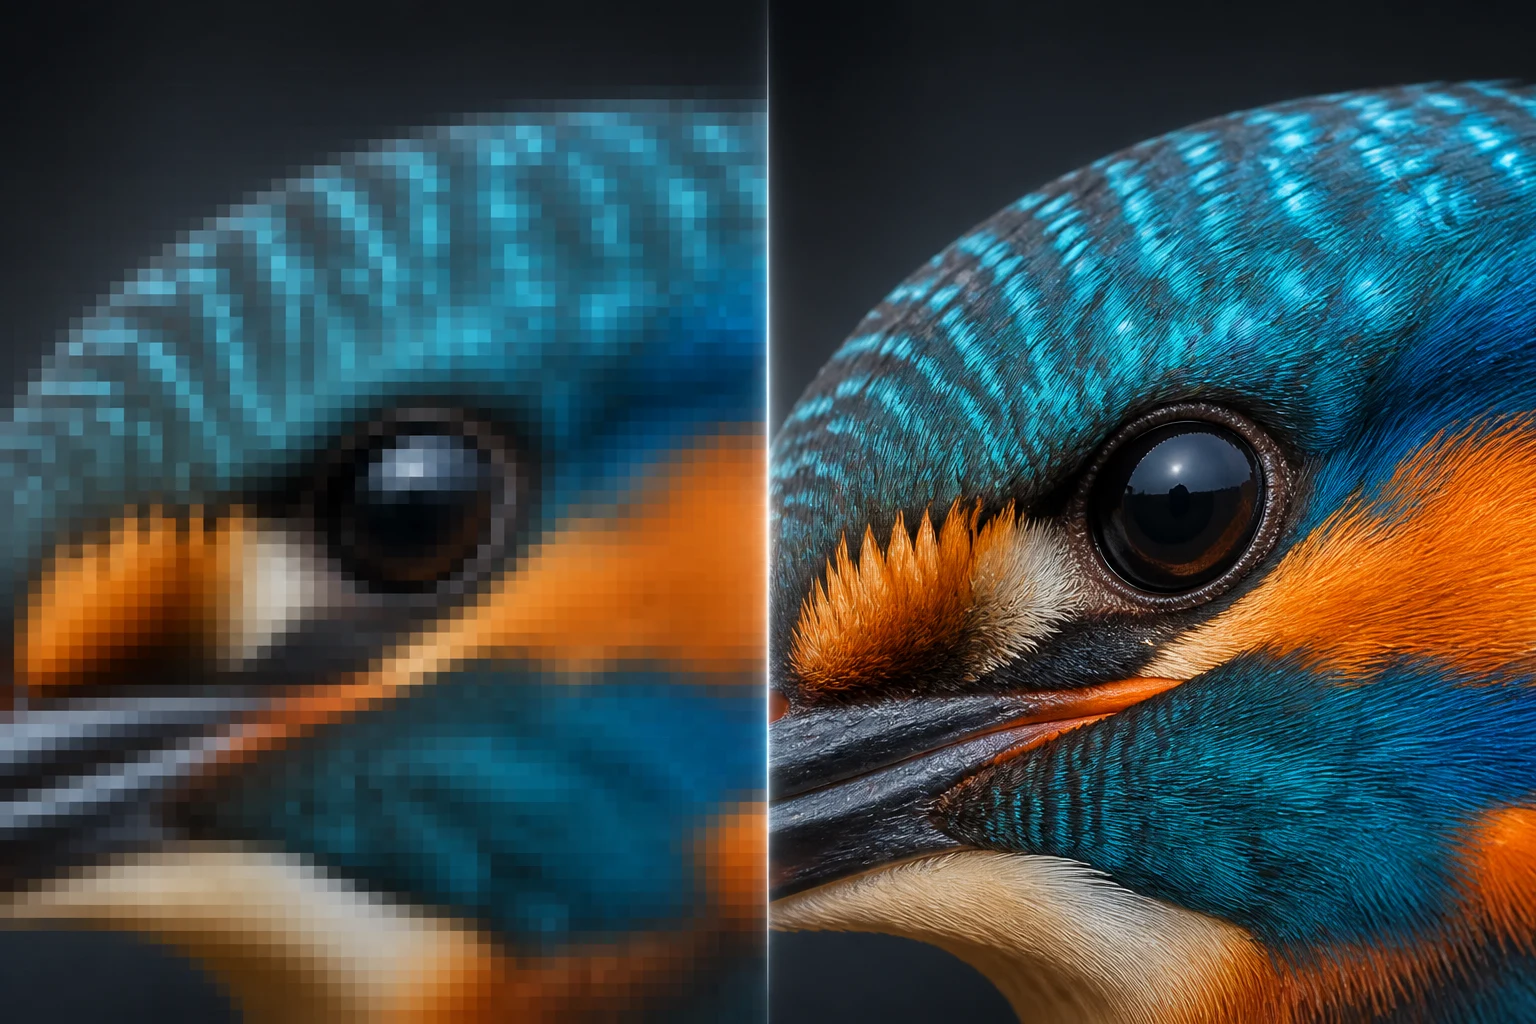
Photoshop and an AI image upscaler can both increase pixel dimensions, but they solve the problem differently. Photoshop gives you explicit control over document size, resampling, noise reduction, sharpening, masks, and later editing. An AI upscaler can reconstruct a cleaner-looking result quickly, but it may also invent texture that was never present in the source.
The right choice depends on the image, output size, accuracy requirements, and how much manual review you can perform.
Quick recommendation
- Use Photoshop Image Size when you need controlled resizing, print preparation, layered editing, or a predictable resampling method.
- Use an AI Image Upscaler when a small raster image needs a fast clarity improvement for web, presentations, social media, or content production.
- Use both when the source needs AI enlargement first and precise crop, color, masking, sharpening, and export afterward.
- Do not expect either method to recover exact text, faces, labels, or product details that are absent from the source.
What upscaling can and cannot do
Upscaling increases the number of pixels. It may improve perceived clarity, reduce visible pixelation, and make an image more usable at a larger display size.
It cannot reliably recover:
- Text that is already unreadable.
- A face represented by only a few pixels.
- Product details hidden by blur or compression.
- Authentic pores, fabric, feathers, or fine structure that the source never captured.
- Correct focus after strong motion blur.
AI may create plausible replacements for missing detail. Plausible is not the same as accurate. That difference matters for products, documents, evidence, medical images, artwork reproduction, and recognizable people.
How to upscale an image in Photoshop
Adobe's current workflow uses Image → Image Size, where you can enter new width, height, and resolution values and enable resampling. Review the latest official Photoshop resize instructions because interface names can change.
Step 1: inspect the source at 100%
Before resizing, identify:
- Pixel dimensions.
- Compression blocks.
- Noise and color artifacts.
- Existing sharpening halos.
- Motion blur or missed focus.
- Small text, faces, product details, and thin edges.
Upscaling magnifies existing problems. Decide which flaws should be corrected before resizing and which are better handled afterward.
Step 2: convert the layer for reversible work
Duplicate the source or convert it to a Smart Object before applying additional filters. Keep an untouched reference for comparison.
Step 3: open Image Size
Choose Image → Image Size. Set the target pixel dimensions or output dimensions.
Do not confuse PPI with pixel count:
- Pixel dimensions determine screen detail.
- PPI affects the relationship between pixels and physical print size.
- Changing only PPI without resampling does not create new pixels.
Step 4: preserve the aspect ratio
Keep width and height linked unless you intentionally want distortion. If the source ratio does not match the destination, crop or extend the canvas instead of stretching the image.
Step 5: enable Resample
Resampling allows Photoshop to add pixels while changing dimensions. Adobe currently documents several algorithms, including Automatic, Preserve Details 2.0, Bicubic Smoother, and Nearest Neighbor for hard-edged pixel art. See the current Photoshop resampling options.
For photographic enlargement, start with Automatic or Preserve Details 2.0 and compare the preview. For pixel art, use an algorithm that preserves hard edges rather than smoothing them.
Step 6: enlarge in one controlled pass
Enter the final required dimensions rather than repeatedly resizing and saving. Repeated destructive transformations can accumulate softness and artifacts.
Step 7: inspect the result at delivery size
Check:
- Eyes, hair, skin, and teeth.
- Product edges and small controls.
- Text and logos.
- Repeating textures.
- Fine lines and diagonal edges.
- Noise in shadows and gradients.
- Halos around high-contrast boundaries.
Step 8: sharpen selectively
Sharpening should support the destination size. Apply it after resizing and avoid sharpening already noisy backgrounds, skin pores, bokeh, or compression blocks.
Use a mask when only the subject needs extra crispness. Always inspect at 100% and at the actual delivery size.
Step 9: export for the destination
Choose color space, format, compression, transparency, and metadata according to the final use. Keep a lossless or layered master if further work may be required.
How to use an AI image upscaler
The Image Upscaler offers a shorter workflow:
1. Upload the highest-quality source available. 2. Confirm the intended output and crop. 3. Run the upscale. 4. Compare original and result at the same zoom. 5. Inspect identity-critical and text-critical areas. 6. Download the result. 7. Apply final crop, color, and output sharpening if needed.
AI upscaling is useful for:
- Small web images needed in a larger layout.
- Presentation and content graphics.
- Social media assets.
- Older photos with moderate softness.
- Generated images that need a larger delivery file.
- Product concepts where exact micro-detail can still be verified against the real product.
Photoshop versus AI upscaling
| Criterion | Photoshop resampling | AI image upscaler | | --- | --- | --- | | Speed to first result | Moderate | Fast | | Manual control | Strong | Simpler | | Predictability | High when settings are fixed | Can vary by image | | Invented detail risk | Lower with conventional interpolation | Higher | | Layered editing | Strong | Requires another editor afterward | | Print preparation | Strong | Needs final print setup elsewhere | | Batch workflow | Available through broader Photoshop automation | Depends on the product capability | | Text and labels | Enlarges existing pixels; cannot restore missing text | May create incorrect characters | | Faces and products | Controlled but may remain soft | Can look clearer but requires identity review |
A fair comparison test
Use one untouched source and create:
- Version A with Photoshop Automatic or Preserve Details 2.0.
- Version B with the AI Image Upscaler.
- Optional Version C with AI upscale followed by restrained Photoshop finishing.
Keep the target pixel dimensions and output format identical.
Evaluate:
- Edge clarity without halos.
- Natural texture without plastic smoothing.
- Face and product identity.
- Text accuracy.
- Noise and compression artifacts.
- Gradient smoothness.
- File size.
- Time required for cleanup.
Do not compare one version at 100% with another scaled to fit the screen. Use identical zoom and delivery conditions.
Which method fits different images?
Ecommerce product image
Use AI carefully for speed, then compare packaging, shape, ports, stitching, texture, and labels with the real product. Finish crop and output settings in an editor.
Portrait
Inspect eyes, teeth, hair, jewelry, skin texture, and identity. Avoid aggressive enhancement that changes the person.
Illustration or generated art
AI upscaling can work well when invented micro-texture does not conflict with a real-world reference. Still check line quality, repeated patterns, and unintended symbols.
Screenshot or interface
Do not use generative upscaling to recover small UI text. Re-export the interface at the correct resolution whenever possible.
Logo or vector artwork
Find the vector source instead of upscaling a small raster logo. Vector output is more accurate and scalable.
Old family photo
Keep the original. AI enhancement may improve presentation while changing facial or fabric detail. Treat the result as a restoration interpretation, not historical evidence.
Common mistakes
- Increasing PPI without adding pixels, then expecting more screen detail.
- Upscaling a compressed screenshot instead of finding the source file.
- Applying heavy sharpening before enlargement.
- Repeating resize and save cycles.
- Judging only the most detailed area and ignoring faces or text.
- Accepting invented product texture as accurate.
- Stretching the aspect ratio to fit a placement.
- Exporting over the only original file.
For a complete commercial-image workflow, read How to Create Product Photos with AI. Clean the source, approve product identity, upscale only after the composition is final, and preserve a master file for later revisions.
Final checklist
- The highest-quality source was used.
- Target pixel dimensions and placement were defined first.
- Aspect ratio was preserved or intentionally cropped.
- Original and upscaled versions were compared at identical zoom.
- Faces, products, text, and logos were checked for invented detail.
- Sharpening was applied after resizing and only where needed.
- Output color, format, and compression match the destination.
- The untouched original remains available.
Upscale an image now
Try the Image Upscaler for a fast first result, then use Photoshop when you need layered finishing, print setup, selective sharpening, or exact export control.